Showing posts with label completed projects. Show all posts

Sunday, 13 November 2011

SNEAK PREVIEW - The 1944 jumper!


Friends, at long last, I have finished the jumper...I think.  This garment was a major pain, primarily because the fabric is unstable, and let's face it, I'm not terribly stable myself.  It's also a plaid.

Here it is with the blouse, but before hemming.  The pattern is Hollywood 1321.


The jumper's not perfect but it's not bad either and Cathy will definitely fill it out better than I do.  That center pleat has been giving me agita however; it doesn't seem to want to hang exactly the way I press it.  How to do I capture the way it hangs so that I can press it correctly?  Pins?  I may need Michael to help me since if you bend to pin with the garment on, the pleat opens.   Or should I just give up on a sharp pleat entirely?  Are you supposed to tack the underpart of the pleat anywhere?  

Readers, do you ever reach that a point in a project when you just have to say, Enough!?  I'm at the point now.  I need to put this one away for a while and revisit it later in the week.  In the meantime I have a vintage Butterick coat to make out of an old wool blanket.

Cross your fingers.


Happy Sunday, everybody!

Saturday, 5 November 2011

$5.49 for THIS? + blouse update


Friends, have you ever made your own shoulder pads?  I have, and while it's not difficult, who wants to bother?  Well, after picking up a pair of Dritz pads for $5.49 at Fashion Design Books on 27th Street, I think I'm going to go back to making my own.

You really have to see and touch these in person to get an idea of exactly how cheap and flimsy they are.  I'm sure they didn't cost more than a nickle to make.  And do they really have to come in a hard plastic box?  What, are they going to break?  I hate packaging that's just about making it easier to hang something on a display rack or to discourage shoplifting.  There are many more shoulder pad options available in the Garment District, of course, but I was too lazy to go there just for these, so I guess I shouldn't complain.  But still...

Anyway, I tacked them into my blouse, and they really make a difference.


Let me tell you about the finishing touches I made to Hollywood 1321, my band collar blouse pattern.  I chose vintage gray plastic buttons; I don't even remember where I got them but they're cute.


I ended up serging my armscye seam allowances.


Buttonholes were no problem.  I used my Singer buttonholer on my 15-91.  Always works.


I added two narrow tucks below the waist in front, roughly 1/2" wide, just for shaping.

And, voila!

Doesn't this blouse make you want to take a letter or fix coffee or something?  It's so Eve Arden!


Dear Customer Service Representative:

Please cancel my order for the two suits and a pair of shoes (dated September 18).  

You recently notified me that the clothes were on back order and that you could not guarantee shipment until December.  Because I need the clothes for a trip in November, neither outfit will be of use to me.

Please credit my account for the total amount ($413.56) immediately.  

Sincerely, 

Mr. Peter Lappin

Male Pattern Boldness Industries, Incorporated


(Sample letter courtesy of Great Personal Letters for Busy People by Dianna Booher)


Will that be all, Mr. Lappin?


OK, kids, it's time to make the jumper.  And how about those overpriced notions?  Don't they make you crazy?

Happy Saturday, everybody!

Tuesday, 27 September 2011

Leah Models the BurdaStyle Halter Dress!


At long last, readers, my BurdaStyle sew-along halter dress photo shoot!  If it seems to you like I've been working on this dress for, like, forever, imagine what if feels like to me. 

This shoot, my first without my cousin Cathy, is bound to invite comparisons between her and Leah.  Please remember that Leah is not a professional model like Cathy, though I think she acquits herself quite nicely. 

Of course, while Cathy requires the merest dusting of powder to look picture-perfect, we had to literally spackle poor Leah with heavy cream foundation to get the results you'll see here.  (It's so important to take care of your skin, readers, and that means never going to sleep in your pancake.  Learn from Leah's errors.)


I don't think Leah knew what she was getting herself into when she agreed to participate in this project: the endless fittings, the drama of disaster averted, or being forced to parade around town in opera-length gloves carrying heavy, actually packed vintage luggage (I wanted her to feel the role, so I used bricks).  Modeling is not for the timid.


Without further delay, the photo shoot.

As always, to see these photos full-size, please click on any image and then, in Picasa, choose "View All" in the upper left hand corner, and "Slideshow."   


Seriously, how adorable is Leah -- and how about that dress on her?

Enjoy!

PS - You can read my final sew-along post over at BurdaStyle here.

Friday, 23 September 2011

How to Store a Strapless Dress, et al.


Friends, I have nothing but admiration for Joan Crawford as a movie star, but I couldn't resist this cheap shot.

As you know, the BurdaStyle dress is finished, and Leah will be taking it home with her next week.  Good thing she is, too, because with my recent obsession with The Daily Ditch, it might otherwise end up at my local Goodwill -- or worse.


Now, while not actually strapless -- it's a halter-top dress -- it does present some storage concerns.  Did I mention the straps are removable?


I can't just hang it from a hanger for two reasons.  For one thing, there's nothing to hang the dress from.  I can't just knot the halter and loop it around a hanger; it would slip right off and wouldn't hang right even if it didn't.

Some of you are probably thinking I should sew in hanging loops.  But the weight of the skirt would pull too heavily on the skirt and stretch the bodice out, I fear.

What I'm going to suggest to Leah -- unless somebody has a better solution -- is that she wrap the dress in tissue paper or a towel or sheet, and keep it folded in a box or drawer until she wants to wear it, and then steam or iron any creases out first.  The dress doesn't have to be starched flat, but it does crease pretty easily.  What do you think?

I'd been working on that dress for so long, I almost don't know what to do with myself now.  Of course, we have our boxers sew-along starting in October, but that's not for a while yet.  What's next for me -- or for any of us, really?

Moving right along...


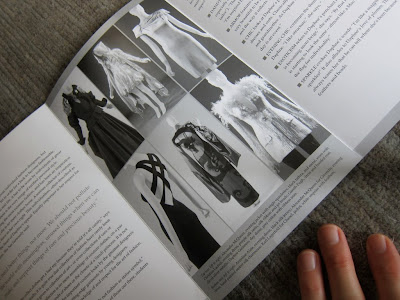
Yesterday, I caught the Daphne Guinness fashion exhibit at the Fashion Institute of Technology, and while it's not really my kind of thing, it's a beautifully curated show.  It's bursting with Alexander McQueens in particular, including fantastic accessories, and despite having just opened, there was hardly anyone there.  I just love the FIT museum, and it's always free. 


Now on to today's Daily Ditch.

Remember how I've always said we don't own a TV?  Well, that's not entirely true.  We own two TV's -- cute little Sony portables from the Seventies -- but they've been sitting at the bottom of my bedroom closet for years collecting dust.  They work, but I don't think you can get reception on them anymore without some sort of converter, and how many door stops does one really need?  Reception or no, they get pitched today.  Pity.

I can actually see glimmers of the bottom of my bedroom closet again!


Friends, that's all for today.  If you have any insights in the best way to store a heavy cotton strapless dress, I'd appreciate it!

Happy Friday, everybody!

Wednesday, 21 September 2011

A girl, a camera, and a pretty dress


Friends, the BurdaStyle halter dress is finished and the photo shoot completed!

Actually, the dress still needs a few tweaks, but nothing visible from the outside.  Both Leah and I love the look of the dress strapless as well as with halter straps, so I'm going to make the straps button-on so she can remove them whenever she wants to.  Leah came up with that idea; I was thinking velcro.

Unfortunately, I think I should wait until the BurdaStyle sew-along formally ends next week to show you the full photo shoot -- I don't want to get sued or anything.  Picture all the glamour and thrills of a Cathy photo shoot, only without the occasional 5 o'clock shadow.

We all love Cathy, but Leah is a such pleasure to work with and -- I hate this about her -- doesn't have any bad angles.  Just like Lana Turner.


I enjoyed playing photographer for a change but it's a lot of work -- especially if you're also the stylist, the gopher, the director, and the location scout.

As you can see up top, my vintage luggage set (the one with the permanent stink) is prominently featured in the shoot (and sadly, may find it's way into the Daily Ditch) and this classic image appears as well. 


Identify it and win....well, the satisfaction of being right!  And speaking of the Daily Ditch, here's what's getting tossed today:

This milk glass vase used to be somebody's old lamp base (hence the hole in the bottom).  I've had it for a zillion years, half-a-zillion of which were spent in my closet.  Let someone else enjoy it.


Not all of Cathy's accessories are fabulous.  This handbag looks like something Ruth Buzzi carried on Laugh-In (Anyone remember that?).  Out it goes.


I often enjoy Bollywood musicals, but some are duds.  Next stop, Salvation Army.


Now, here's an example of the Magic of the Daily Ditch.

When I went to drop off a bag of Cathy's shoes at the Salvation Army yesterday, I found this beautiful Alvar Aalto vase, in its original box, for $5.99.   Yes, $5.99.


A very good deal indeed and I immediately felt better about that horrible Huskylock serger.

It occurs to me that some of you might be interested in seeing all of my Daily Ditch items to date in one place.  You can view them here.

Readers, I'm off to put some buttonholes in halter straps and continue digging myself out of my junk.  You?

Have a great day, everybody!

Friday, 5 August 2011

Cathy models the strapless 50's cocktail dress!


Friends, at long last, the cocktail dress photo shoot.

I know there was some drama involved in this project and undeniable differences of opinion with many of you, beloved readers, but I like to think that, in the end, it only brought us closer. 

As always, my talented cousin proved herself a true pro, handling yards of tulle, a boned bodice, and multiple layers of crinoline with aplomb, and even submitting to the indignities of a Maidenform "Control It!" Waistnipper brief.  The summer evening couldn't have been more lovely, gentle breezes blowing through Cathy's soft hair and carrying her tulle wrap aloft.  It was all very dreamlike.

I hope you'll enjoy this slideshow, which includes a special guest appearance from my wonderful photographer, Michael, as well as a number of other unexpected cameos.

As always, to see these photos full-size, please click on any image and in Picasa, choose the album name, and then, in the upper left hand corner, "Slideshow."


I'll admit that I wasn't quite sure athletic Cathy could pull off the strapless look, but I think she does this dress justice, don't you?

Is there a strapless cocktail dress in your future?  

Have a great day, everybody!

P.S.  Remember how it all started?

Wednesday, 3 August 2011

Crinolines on Parade!


Goodness, my demi-pliƩ isn't what it used to be....

Oh, you're here!

Friends, I am happy to announce that my crinolines are nearly finished.  Yes, you read that right: crinolines -- plural.  As I was gathering my 10 yards of nylon net yesterday and realizing I could wrap my entire living room with it, twice, I came to the conclusion that it would make more sense to make two crinolines, which could be worn one on top of the other, or separately.  Eureka!

Perhaps you're wondering: what is the difference between a crinoline and a petticoat?  Basically, nothing.  People often use the word crinoline to mean a stiff net petticoat, or underskirt.  And crinoline is often what people call the stiff nylon net fabric (as opposed to tulle, which is soft net).  But here in Chelsea, at least, we use the words interchangeably.

Part of the challenge of making the gathered tiers, which a number of you alluded to in your comments yesterday, is that working with a ruffler foot, one can only gather so much.  Setting the stitch length down to the tiniest stitch made the gathers much denser, since there's less space between the ruffles, but there's a limit.


Many commenters recommended gathering by hand, and in theory I get why that would create a denser ruffle.  The problem is that it's very difficult to put a pin through the net I am working with, so how do you "anchor" the gather once you've pulled your gathering threads, or if you need to adjust it?  The weave is so wide that the pin usually falls right out.  The other challenge is that the denser (and higher) the gather, the harder it is to fit it under the presser foot of my sewing machine when you're attaching the gathered tier to the next higher tier.


Anyway, I made two crinoline petticoats, and I love them.  I still have to bind the seam allowances with ribbon.  The seams themselves are very strong, but the raw edges are a little rough to the touch.  If the bottom crinoline were worn with the raw seam allowances facing up, and the top crinoline worn with the raw seam allowances facing down, would I have to bind those edges at all?   Isn't that basically just for show?  Anywho, I will definitely bind the seam allowance where the top net tier attaches to the fabric, since the fabric (sort of a cotton batiste) frays.

Here's the cotton yoke.  There's nothing to it, though I did use a piece of the Simplicity petticoat pattern I have, since I had it.


One crinoline has an elastic waistband in a casing.  Here's the yoke without the net attached.


For the other, just to keep things interesting, I stitched grosgrain ribbon to the top and ran twill tape through for a drawstring.  A drawstring's a little classier than elastic, no?


One short cut I discovered was this:

The tutorial I followed has you close up each tier into a cylinder before gathering and attaching to the next highest tier.  This means that the tiers (one gathered, one not) must be precisely the same circumference (like easing in a sleeve).  I found that I could get the the same result by attaching the two tiers flat (like attaching a sleeve with the torso still open).  That way, if there's a little extra net on one tier or the other at the end, you can simply cut it off.

Then, after all the net tiers are attached, you can simply make a single vertical french seam up the side.  Since the net is very flouncy and gathered -- not to mention that it's worn under a skirt (or another petticoat)-- the seam doesn't affect the drape of the crinoline, not in my experience anyway.  (You can actually sew the net to the cotton yoke open as well.)  It just makes the whole thing easier.

I am so glad I pushed through this, though, like I said, there's still some trim to add, which I hope to put behind me today.


You may be wondering how the crinolines look under the strapless cocktail dress.  Wonderful!

In closing, readers, now that skirts for men are taking the world by storm, can the crinoline be far behind?  I may have hit upon the next big thing in men's fashion.  At least in big cosmopolitan cities and Fire Island. 


If you have any questions about crinolines, please feel free to ask.  I may not be able to answer them but somebody out there will, no doubt.

Have a great day, everybody!

Anyone out there wearing a crinoline?

Sunday, 19 June 2011

Peter models the funky-cuffed summer shirt!


Readers, the shirt is finished and yesterday, with Michael's able assistance, I got to play fashion model!


I am now thinking the lavender cotton shirt fabric, which I had originally identified as lawn, is in fact voile.  Or gauze.  Or something.  As you can see in the photos, it's slightly transparent, loosely woven, and very soft.  In fact, the softness and loose weave resulted in the one (minor) disappointment in the shirt construction.


Not wanting to deal with flat-felled seams on such soft fabric, I'd planned to stitch the sleeves on, serge the seam allowance, and then stitch the seam allowance down to make a mock flat-felled seam.  However, even with the shirt open and flat (before I'd stitched the sleeve and torso closed), I was unable to stitch down the seam allowance without puckering -- it's that stretchy and soft.  This wasn't a tension issue, though it caused some!

I completed one side, and then ripped it out (gently); traces of which are slightly visible.  Has this ever happened to you?


Anyway, with a shirt this casual and summery, it's fine, and it's not like I'm going to be hurling baseballs in it or anything.  The shoulder seam is perfectly secure.


Here are a few more construction details.  You can view the whole folder of construction pics here.

I interfaced the collar stand with knit weft interfacing on just the outer layer.  For the collar itself I used an additional layer of my fashion fabric (I was short on interfacing).  This is one of my better collar stands.


I topstitched all the way around the stand; sometimes I skip that step.  With the exception of the buttonholes, I sewed the shirt entirely on my Featherweight, using a #9 needle.  Anything larger would occasionally snag the fabric.


I finished the sleeves and side seams with French seams, stitching at 2/8" wrong sides together, trimming down to 1/8 inch, pressing, and then stitching right sides together at roughly 3/8".  I like the result -- clean.


The buttonholes, which I made on my 15-91 with my buttonholer attachment, aren't gorgeous.  I chose not to interface the front left button placket and it could have used a little more heft for prettier buttonholes.   Do you see how the fabric puckers along the width of the placket?  Still, they're stable and not particularly noticeable.   (I really should clip those stray threads...)


And that's it.

Here's a little slide show of me modeling the shirt.  No sailors, I'm afraid.

As always, to see these photos full-size, please click on any image.  In Picasa, click on the title of the folder, and then in the left hand corner, "Slideshow."


Happy Sunday, everybody -- and to all your fathers out there, Happy Father's Day!